Table of Contents
ToggleNew Orleans style outdoor lighting captures the romance and elegance of the French Quarter, blending historic gas-lamp aesthetics with modern functionality. Homeowners drawn to this timeless approach find that well-placed Southern-inspired fixtures transform an ordinary patio or entryway into a sophisticated outdoor room. Whether you’re renovating a period home or simply want to add New Orleans character to your existing landscape, understanding the key design elements, from wrought iron scrollwork to warm amber glows, is essential. This guide walks you through selecting and installing authentic Southern outdoor lighting that’ll make your home feel like a stroll down Royal Street.
Key Takeaways
- New Orleans style outdoor lighting combines ornamental wrought iron fixtures with warm color temperatures (2700K–2200K) to recreate the romantic aesthetics of the French Quarter.
- Essential fixtures include gas-inspired lanterns, carriage lamps, wrought iron sconces, and string lights with Edison-style bulbs that function beautifully in both covered and open outdoor spaces.
- Strategic placement using symmetrical pairing, consistent heights, and layered lighting (ambient, task, and accent) transforms ordinary patios into sophisticated outdoor rooms with maximum visual impact.
- Post-mounted lights and buried wiring require proper installation—including concrete footings below the frost line and underground-rated PVC conduit—to ensure safety and longevity.
- Choose warm-white or soft-white LED bulbs compatible with LED-rated dimmers to achieve authentic Southern charm affordably while avoiding the flickering issues of standard incandescent dimmers.
- Quality New Orleans outdoor lighting ranges from $40 to $300+ per fixture; investing in hand-forged details and durable finishes (matte black, oil-rubbed bronze, aged brass) ensures both authenticity and lasting appeal.
Understanding New Orleans Outdoor Lighting Aesthetics
New Orleans style outdoor lighting draws heavily from 18th and 19th century colonial and Creole architecture. The look hinges on a few core principles: ornamental wrought iron, warm (not cool white) light sources, and fixtures that feel handcrafted rather than mass-produced. Unlike modern minimalist outdoor lighting, New Orleans-style pieces are unapologetically decorative. They’re meant to be seen and admired during the day and appreciated functionally at night.
The warmth of the light matters as much as the fixture itself. Most authentic Southern lighting uses color temperatures in the 2700K to 2200K range, that golden, incandescent glow you’d expect from a gas flame. Modern LED bulbs have made achieving this look easier and more affordable than ever: choose “warm white” or “soft white” options rather than “daylight” or “cool white.”
Good New Orleans-style outdoor lighting also plays with shadow and depth. Wrought iron grilles and ornate metalwork cast intricate shadows when backlit, adding visual drama. This theatrical quality is what separates the style from purely functional landscape lighting. The fixtures should enhance your home’s architecture, not just illuminate it.
Essential Elements of Authentic Southern Outdoor Lighting
Gas-Inspired Lanterns and Sconces
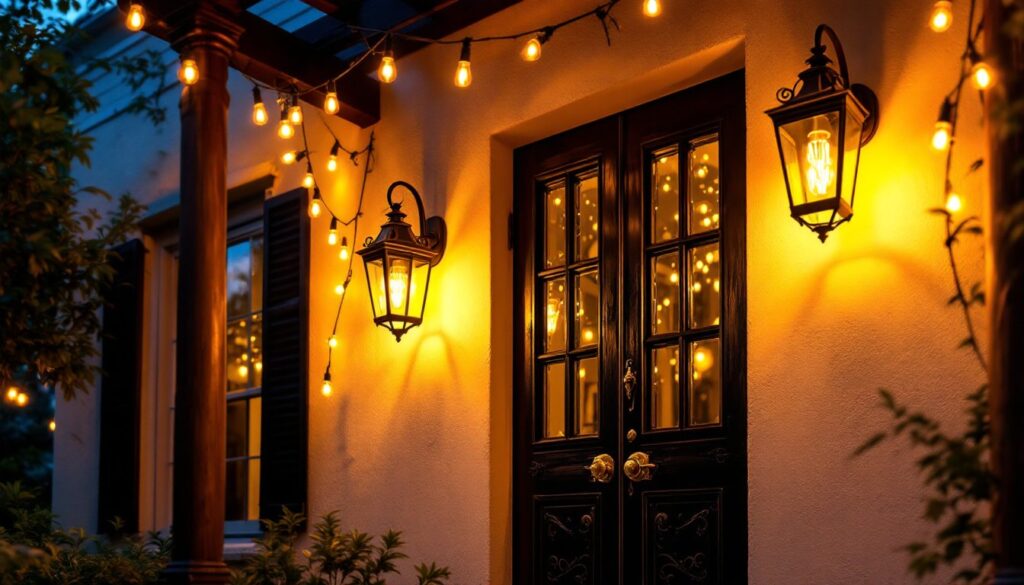
Gas lanterns are the poster child of New Orleans outdoor lighting. These fixtures mimic the appearance of old street lamps and carriage lanterns while running on electricity, no open flames or safety hazards. Look for lanterns with clear or frosted glass panels and solid brass or black-finish metal frames. The glass panels should be multiple panes (usually four or six) arranged in a grid, which gives the authentic colonial look.
Sconces mounted on exterior walls work well flanking entryways, garage doors, or pergolas. Choose models with visible metalwork and vintage-style Edison-filament bulbs (clear glass showing the glowing filament) or warm LED equivalents. Pair sconces at consistent heights, typically 18 to 24 inches above doorways or 60 to 66 inches above walkways, for balanced visual weight.
Wrought Iron and Ornamental Fixtures
Wrought iron defines Southern elegance. Look for fixtures featuring scrolls, botanical motifs (acanthus leaves, floral filigree), and hand-forged details. These aren’t wimpy details, quality wrought iron fixtures have substance and character. Avoid anything that looks stamped or plastic: you want metal that feels weighty.
Pendant lights with wrought iron cages or guards, chandeliers for covered pergolas, and post-mounted fixtures for driveway entrances all work beautifully. The ornamental ironwork should coordinate with other exterior elements, railings, gates, or window grilles, to tie the overall aesthetic together. Finishes typically include matte black, oil-rubbed bronze, or aged brass, which patina over time for added authenticity.
Popular New Orleans Outdoor Lighting Fixtures for Your Home
Carriage lanterns are workhorses in New Orleans-style yards. These wall-mounted fixtures have a square or hexagonal shape with multiple glass panels and a peaked roof, resembling old coach lamps. They’re perfect for entry doors, gate pillars, and transition spaces. Size typically ranges from 10 to 18 inches tall, so measure your wall space before ordering.
String lights and bistro bulbs strung overhead create ambient, gathering-friendly spaces on patios and porches. Select warm-white Edison-style bulbs (amber glass, visible filament) rather than globe or modern LED shapes. String them between posts, pergola beams, or trees at varying heights for a relaxed, lived-in feel reminiscent of French Quarter courtyards.
Chandelier-style fixtures work for covered outdoor spaces, screened porches, gazebos, or deep pergolas. Look for brass or iron bases with candle-style sockets and warm-dimming capabilities. These add formality and shouldn’t be oversized: a 24 to 30-inch diameter is typical for most residential applications.
Post-mounted lights mark driveways, garden paths, or property entrances. Wrought iron post-top fixtures with a lantern at the summit are classic. Post height typically stands at 8 to 10 feet for visibility without glare. Make sure the post base is set in concrete below the frost line (varies by region) for stability.
All these fixtures are widely available through specialty lighting retailers and online home improvement suppliers. Price ranges vary wildly based on materials and finish: expect $40 to $300+ per fixture depending on quality and complexity.
Design Placement Strategies for Maximum Visual Impact
Strategic placement transforms lighting from functional to fabulous. Start by identifying your home’s architectural focal points: entry doors, porches, pathways, water features, or pergolas. These are anchor points for primary lighting.
Pair fixtures symmetrically when framing important zones. Mount matching sconces on either side of an entryway at equal heights and distances, 36 to 48 inches apart is typical. This symmetry feels intentional and balanced. For wider spaces (oversized garage doors or patio entries), increase spacing to 5 to 6 feet to avoid a cramped look.
Layer your lighting: combine overhead ambient fixtures (chandeliers, string lights) with task lighting (pathway markers, accent sconces). This layering creates depth and allows you to adjust mood with dimmer switches. A contemporary approach pairs one dramatic fixture with several subtler supporting lights rather than uniform brightness everywhere.
Height consistency matters. If installing multiple sconces along a facade, maintain uniform mounting heights. Vertical misalignment reads as careless, even if accidental. Use a level and painter’s tape to mark positions before drilling.
For landscape features, trees, gardens, water fountains, consider uplighting with small stake lights or spotlights. These should blend into landscaping during the day: run wiring underground in PVC conduit rated for buried outdoor use to avoid tripping hazards and unsightly cords. Code requirements for buried electrical work vary: some jurisdictions require licensed electricians for outdoor circuits. Check local building department guidelines before digging.
Warmth of light color is crucial. All outdoor lights in a coordinated area should match color temperature (all 2700K, for example). Mixing warm and cool whites looks unfinished. Test bulbs before committing if possible, many retailers allow returns.
DIY Installation Tips and Best Practices
Installing wall-mounted sconces and lanterns is approachable for most DIYers familiar with basic electrical work. Turn off power at the breaker before starting. Gather a power drill, level, tape measure, wire strippers, wire nuts, and a stud finder.
Locate the stud behind the mounting location. New outdoor fixtures should be anchored to framing, not just drywall or siding. If you can’t hit a stud, use heavy-duty lag bolts with expansion anchors rated for your wall material. Pre-drill holes with a bit slightly smaller than the bolt diameter to prevent splitting wood siding.
For new circuits or high-amperage fixtures, running wire from the breaker panel is necessary. This work often requires a licensed electrician and a permit, depending on local codes. For simple replacement of existing fixtures (rewiring into existing outlet boxes), the job is more straightforward: disconnect the old fixture, thread new wires through the mounting bracket, connect them using wire nuts, and secure the fixture to the box.
Post-mounted lights need concrete footings. Dig a hole 12 to 24 inches deep (below your local frost line) and 6 inches wider than the post base. Set the post in concrete mixed to manufacturer thickness, ensuring it’s perfectly vertical with a level. Let concrete cure fully, typically 48 hours, before testing lights or rough terrain use.
For buried outdoor wiring, use underground-rated PVC conduit, not standard electrical conduit. Bury it 18 to 24 inches deep where foot traffic is unlikely. Mark the trench with landscape flags or paint so future digging doesn’t hit it. Some codes mandate professional installation: verify before starting.
Always wear safety glasses and work gloves when drilling, digging, or handling metal fixtures. If working at height (roofline sconces), use a stable ladder with a spotter. Test the fixture before final mounting: it’s easier to troubleshoot with it loose than secured to the wall.
Use warm-dimming LED bulbs compatible with your fixture’s socket type (E26, E12, etc.). Dimmers rated for LED loads ensure smooth operation: standard incandescent dimmers can cause flickering with LEDs. A remote-controlled dimmer system lets you adjust mood from inside on cold nights without extra wiring hassle.